The process of upgrading to Dynamics 365 Business Central from Dynamics NAV can be complicated. Here is a guide to a successful transition.
The following step comprises the process of upgrade NAV 2027 to Business Central:
1. Creating a full SQL backup of old database:
Before conducting the upgrade NAV 2017 to Business Central, make sure that you have created a full backup of the old database in the SQL server.
2. Uninstalling all extensions in the old database:
In the very second step you have to get rid of all the data bases that you have been using in the previous structure. This starts with opening the Dynamics NAV Administration Shell.
3. Uploading Business Central partner license to the previous database:
You have to carry out the process of uploading the Business Central partner license, by using the Dynamics NAV Development Environment which matches the previous database.
4. Deleting all objects except tables in the previous database:
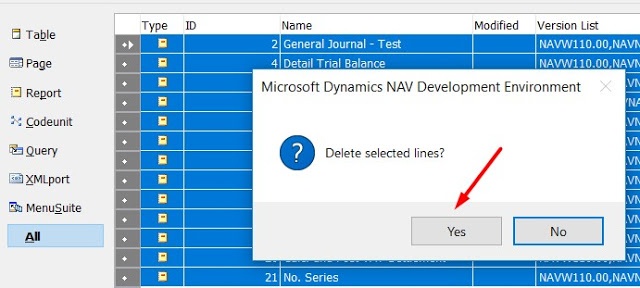
In this step, you have to open the old database then go to Object Designer, then select and delete all the objects except the tables.
5. Clearing server instance and debugger breakpoint records in old database:
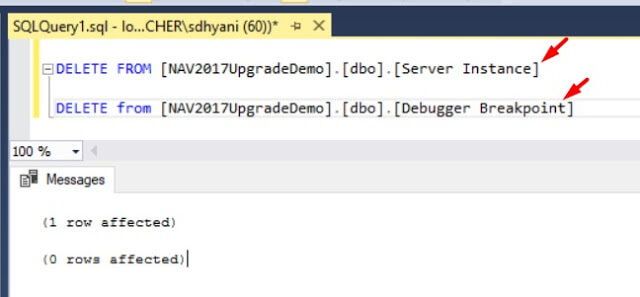
For successful upgrade NAV 2017 to Business Central, it is important to delete all the previous server instance and debugger breakpoint tables in the database in the SQL server.
6. Converting the old data base to Business Central:
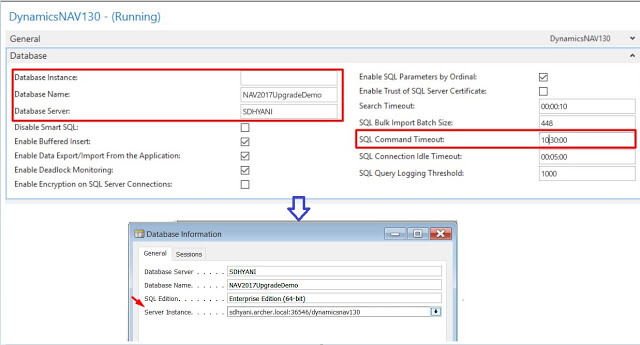
To carry out this process, you have to run the new Dynamics NAV Development Environment for D365 Business Central. Next, open the new database and continue with following the conversion instructions.
7. Importing upgrading application objects to converted database:
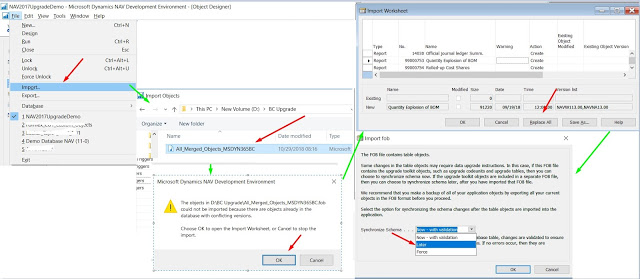
Using the Microsoft Dynamics NAV development environment for Dynamics Business Central, you have to import the application objects that you require in the new database.
8. Connecting a Business Central Server instance to the converted database:
Here you have to use all the Dynamics 365 Business Central Server database tools in the Administration Shell to merge a Business Central server instances to the converted database.
9. Compiling all objects in a converted database:
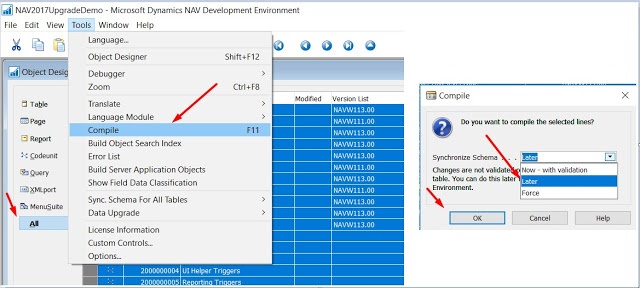
In this step you need to compile all objects that include the imported data tables, system tables, and application objects.
10. Running the schema synchronization on converted database:
This step consists of synchronizing the database schema with validation.
11. Running data upgrade on converted database:
A data upgrade stands for running the upgrade toolkit objects which includes upgrade tables and upgrade codeunits, to move the business data from the old table structure to the new one. You can either start this process from Dynamics NAV development environment or Dynamics 365 Business Central Administration Shell.
12. Upgrading JavaScript-based control add-ins to new versions:
Dynamics 365 Business Central server installation consists of a new version of JavaScript-bases control add-ins, provided by Microsoft. In case you have been using any of the add-ins, you will have to upgrade them to the latest version as well.
13. Publishing and generating symbols for extensions:
In this step of upgrade NAV 2017 to Business Central, you need to publish and generate symbols that are required to use V2 extensions. These symbols serve multiple purposed and are provided as an extension package and are published to server instance.
14. Publishing and installing local functionality extensions:
While upgrading from Denmark (DK) version of Microsoft Dynamics NAV 2017 or earlier, you will have to publish and install a list of extensions to get the local functionality. You have to follow the following steps for each extension:
1. Publishing the new extension version.
2. Synchronizing the schema with the database.
3. Installing the new functionalities extensions.
15. Importing permission sets and permissions:
In this step you have to import the permission XML files and permission sets that you exported from the old database. This includes the following steps:
16. Importing data encryption key:
If you wish to use data inscription like in the previous system, you must import the data encryption key file that you exported before. However, this is a step you can skip.
17. Setting the language of customer database:
In this step of upgrade NAV 2017 to Business Central, you have to choose Tools, and then choose Language, in the Dynamics NAV Development Environment and then select the language of the original customer database.
Image Source: sauravdhyani

